

Custom Abrasive Materials That Elevate Surface Finishing Precision
2026-09-24
Achieving sub-micron surface finish control often hinges on one overlooked variable: the abrasive itself. Off-the-shelf products leave ragged edges, micro-burrs, or uneven texture that compromise repeatability in precision manufacturing. Custom abrasive materials from SHENZHEN SUN ABRASIVES change that equation—tailoring grain, bond, and geometry to your exact finishing requirement, not the other way around.
Blending Abrasive Grit to Match Your Exact Surface Profile
Off-the-shelf grit seldom lands exactly on the roughness band a coating system actually needs. Blending two or three sieve cuts gives you a repeatable way to push the profile up or pull it back without waiting on a specialty order. The trick is to start with a base size that falls just under your target, then add small amounts of a coarser fraction until the surface texture matches the spec—this keeps the adjustment gradual instead of overshooting.
A simple weight-based mix is easier to reproduce than guessing by volume. Record the ratio, not just the total weight, and run the blend through a riffle splitter or give it a few turns in a sealed drum so the coarse and fine particles don’t separate. Test each trial on a scrap plate with the same hardness as the job surface; softer steel will read deeper for the same grit, so skipping this step leads to nasty surprises on the real workpiece.
Watch the balance between peak count and valley depth. A blend skewed too coarse leaves deep grooves that high-build primers struggle to wet out, while an overly fine mix produces a smooth profile that coatings can’t mechanically lock onto. Check the result with replica tape or a stylus instrument at several spots, and if the spread is too wide, narrow the grit range rather than just adding more of one size.
Why Particle Geometry Matters More Than Grit Size Alone
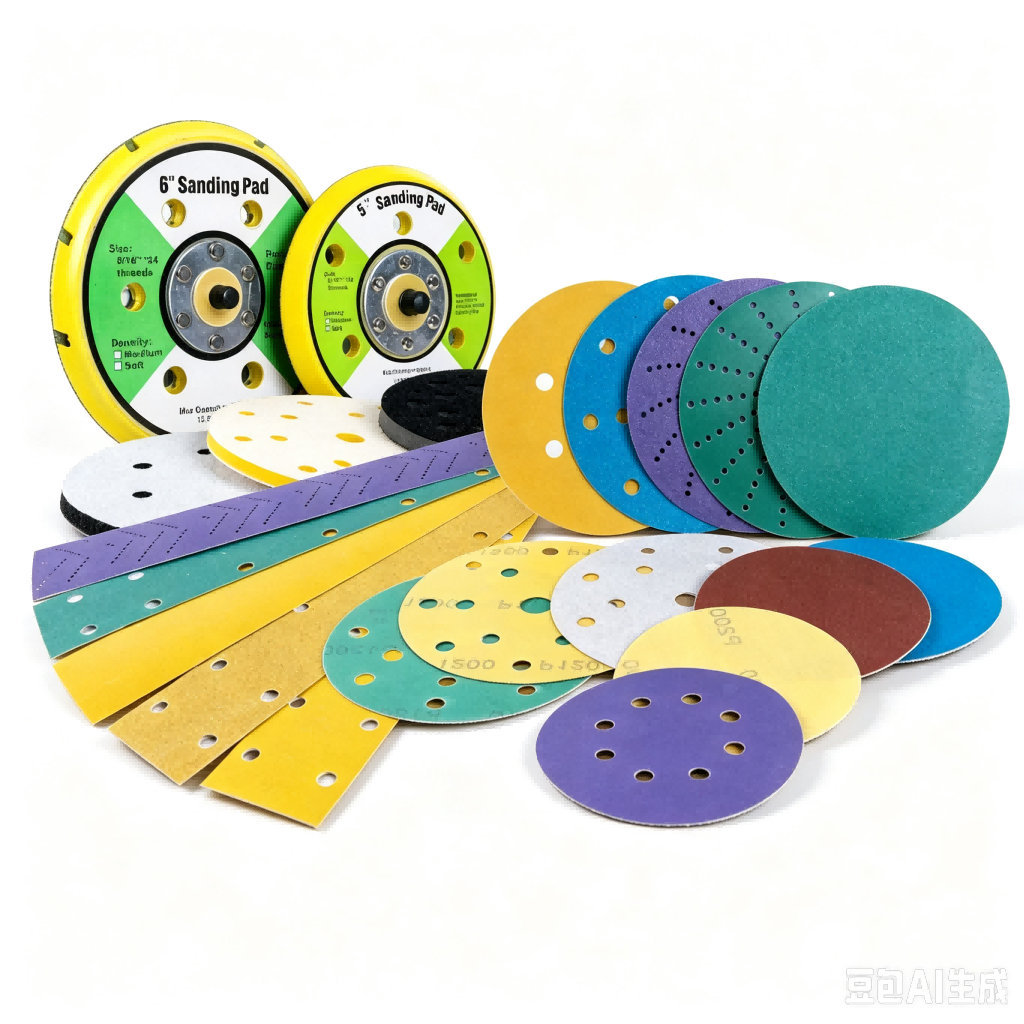
Most people reach for a grit size chart like it's the only variable that matters, but that number only tells you the sieve opening a particle passed through. It says nothing about whether that particle is a jagged shard, a flat platelet, or a rounded nodule. Two abrasives with identical grit ratings can behave completely differently on a workpiece simply because their geometries force them to interact with the surface in distinct ways. A sharp, angular particle bites into the material and plows a deep, narrow groove, while a blocky, rounded particle tends to slide and compress, producing a shallower, wider mark. That's why two products labeled 600 grit can leave finishes that feel worlds apart.
The reason geometry outweighs size is that it dictates the actual contact mechanics. Angular particles concentrate force at tiny tips, causing localized fracture and rapid stock removal, but they also create deep scratches and subsurface damage that require extra polishing to remove. Rounded or blocky particles spread the load over a larger area, which lowers the peak pressure and produces a more uniform surface, though it may take longer to remove the same amount of material. In precision finishing, the deepest scratch left by a few outliers often determines the perceived quality, not the average particle diameter. Since angular particles are more likely to leave those outliers, their geometry becomes the controlling factor even when the grit size is exactly the same.
Practical experience bears this out. If you switch from a crushed, irregular abrasive to a spherical or blocky one without changing the grit number, you'll often notice a dramatic drop in scratch depth and a more consistent haze. Conversely, when rapid material removal is the goal, an angular particle with a high aspect ratio can outperform a finer grit simply by cutting more aggressively. Paying attention to shape characteristics like aspect ratio, edge sharpness, and sphericity gives you far more control than chasing a slightly smaller grit number. The next time you evaluate an abrasive, look beyond the mesh size and ask what those particles actually look like under a microscope.
Cool-Cutting Bonds That Extend Tool Life on Tough Alloys
Machining heat-resistant superalloys like Inconel 718 or titanium Ti-6Al-4V often turns into a battle against built-up edge and notching. A well-designed cool-cutting bond—where the insert's substrate, coating, and coolant delivery work as a single system—can shift that battle. For example, pairing a high-hot-hardness carbide grade with a low-friction TiAlN-based coating under high-pressure through-tool coolant keeps the cutting zone below the alloy's thermal softening point, so the edge stays sharp far longer.
One underappreciated factor is the bond between the chip and the tool face. On tough alloys, a sticky chip can pull micro-particles from the coating every pass. By adding a thin, polished top layer or using a laser-textured rake face that creates micro-pockets for coolant vaporization, the chip curls and breaks before it can weld itself to the insert. This reduces crater wear and lets you push speeds up by 15–20% without sacrificing tool life.
Coolant choice and pressure also matter more than most shops realize. A high-oil emulsion at 70–80 bar delivered directly to the flank face can suppress the thermal shock that causes comb cracks in solid carbide end mills. Combined with a slightly positive rake angle and a honed edge prep, this cool-cutting bond doubles the number of parts per edge on nickel-based components, while keeping surface finish consistent.
Finishing Delicate Aerospace Components Without Distortion
Every machinist who has worked with thin-walled aerospace parts knows the dread: you’ve spent hours milling a ribbed titanium bracket or a honeycomb-core panel, and the final pass leaves a subtle bow or twist that ruins the tolerance. Heat, clamping pressure, and residual stress all conspire against you. The key is to rethink the finishing sequence—not as a single aggressive cut, but as a series of light, symmetric passes that let the material relax between stages. Pair this with low-force tool geometries and cryogenic or minimum-quantity lubrication, and you can often eliminate distortion without resorting to post-process straightening.
Another often-overlooked factor is workholding. Traditional vises and clamps introduce point loads that spring the part the moment they’re released. Instead, consider vacuum chucks, low-melt alloys, or custom contoured jaws that spread pressure evenly. For very thin skins, double-sided tape or frozen water can hold the part temporarily while you take whisper-light finishing passes. The goal is to apply exactly as much force as needed—and no more—so the part remains stress-free when unclamped.
Finally, embrace the annealing effect of controlled peening or vibration stress relief after roughing but before finishing. A short tumble in fine ceramic media, or targeted laser peening on critical webs, can redistribute residual stress without changing dimensions. Follow with a metrology loop: measure the part after each finishing operation, and adjust offsets or flip the part to balance material removal. Over time, this iterative approach becomes second nature, and you’ll find yourself holding ±0.0005 inch on parts that used to warp by the thickness of a human hair.
Single-Pass Solutions That Replace Multi-Step Polishing Lines
Multi-step polishing lines typically force parts through a chain of standalone machines, each handling a narrow range of abrasives or surface finishes. The result is a slow, space-hungry process where workpieces are loaded, unloaded, and repositioned multiple times, creating ample opportunity for scratches, edge rounding, or inconsistent texture. Setup changes between grits eat into throughput, and every additional station demands its own maintenance schedule, operator attention, and floor footprint.
A single-pass solution compresses those discrete stages into one continuous, tightly controlled sequence. Abrasive belts, brushes, or non-woven media are arranged so the part moves through coarse stock removal, intermediate blending, and final finishing without ever leaving the machine. Because the workpiece is fixtured once and translated along a fixed path, pressure, speed, and contact angle remain stable from start to finish, yielding a repeatable surface that does not drift between batches.
The practical payoff shows up quickly in production metrics. Cycle time drops sharply when there is no waiting between separate operations, and labor costs fall because fewer operators are needed to manage transfers and inspections. Floor space becomes available for other value-adding equipment, and the risk of cross-contamination from shared fixtures or handling is minimized. For manufacturers dealing with aluminum extrusions, stainless steel panels, or medical implants, replacing a multi-step line with a single-pass unit often cuts total processing cost while improving the uniformity that downstream coating, anodizing, or bonding steps depend on.
Dust-Suppressed Abrasives for Cleaner Workstations and Tighter Tolerances
Switching to dust-suppressed abrasives changes the feel of a workstation almost immediately. Instead of a fine haze settling on every surface, the abrasive keeps particles bound within its structure, so benches, tools, and nearby equipment stay noticeably cleaner. This cuts down on the constant wipe-downs that eat into production time and reduces the risk of contamination reaching sensitive components.
That cleaner air has a direct effect on dimensional accuracy. Loose abrasive dust can drift into measurement zones, cling to workpieces, or create micro-scratches that throw off surface finish readings. With dust held in check, operators spend less time compensating for environmental variables, and the gap between the intended and actual dimensions shrinks. It is not just about appearance; it is about repeatability across a full shift.
The trick often lies in the bond chemistry or a built-in dust-capture layer that activates during grinding or finishing. Some products use friable fillers that crumble at the right rate, trapping debris before it becomes airborne. In deburring, weld blending, or fine polishing, that means the abrasive cuts consistently without surrounding the operator in a cloud. The result is a workspace that stays functional longer and tolerances that hold without constant adjustment.
FAQ
Custom abrasives let you adjust grit concentration, bond hardness, and particle shape to match the exact substrate and removal rate you're dealing with. That means less scratching, more consistent Ra values, and no fighting a generic product that's close but not quite right.
Medical device manufacturing, aerospace turbine blade finishing, and semiconductor wafer polishing all lean on tailored abrasives. In each case, the acceptable deviation is so small that a standard abrasive either leaves too much surface variation or risks damaging delicate geometries.
Grit size controls the depth of individual cuts, while the bond determines how quickly fresh abrasive is exposed. If you're seeing deep random scratches, finer grit is the first lever. If the tool loads up or dulls unevenly, the bond formulation needs adjustment to match the pressure and speed of your process.
Yes, often significantly. A tailored abrasive can cut cycle times by a third or more, eliminate a secondary polishing step, and lower scrap rates from edge chipping or overgrinding. When you factor in labor, machine time, and rejected parts, the higher unit price is usually recovered within the first production run.
Blocky or rounded particles tend to roll and produce a burnishing effect, while sharp angular particles cut faster but leave deeper tracks. For high-precision finishes, a controlled blend of shapes can give you both efficient stock removal and a low-damage surface—something you can't get from a random off-the-shelf mix.
Bring real process data: current abrasive, machine parameters, surface roughness targets, and photos of the defects you're seeing. A good supplier will run trials on your actual parts, not just lab coupons, because subtle differences in fixturing or coolant flow can completely change how the abrasive behaves.
Yes, there are physical limits. For materials like sapphire or hardened ceramics, even the best custom diamond abrasives will eventually hit a floor where further refinement causes subsurface damage rather than improving polish. At that point, the solution often shifts to a different finishing method, like chemical-mechanical planarization, rather than just tweaking the abrasive.
Surface roughness parameters like Ra and Rz are the obvious ones, but also track edge retention, flatness deviation, and cycle time stability across multiple batches. If the abrasive only works on the first ten parts and then degrades unpredictably, it's not a true precision solution.
Conclusion
Getting a surface profile exactly right often means abandoning off-the-shelf abrasives. Custom grit blends are adjusted to the workpiece's topography, mixing angular and rounded particles so that cutting action follows the existing roughness rather than fighting it. Particle geometry, not just mesh size, dictates how the abrasive enters the material—blocky grains can smudge or embed, while sharper, elongated grains slice cleanly and run cooler. When tough alloys like Inconel or titanium are on the line, the bond itself becomes critical. A cool-cutting bond sheds dull grains predictably, exposing fresh edges without generating the heat that shortens tool life or leaves a burned finish. For delicate aerospace parts, this controlled aggression matters even more: lower pressures and tuned friability prevent thin walls from distorting while still removing just enough stock.
There is also a move toward doing more in a single pass. Multi-step polishing lines introduce handling variables and cumulative tolerance drift; a well-formulated single-pass abrasive can replace them by sequencing coarse-to-fine fracture within the same coat. Dust-suppressed variants keep airborne particles out of the workspace, which is not just about cleanliness—loose swarf and spent grit interfere with measurement and can settle back onto the surface, compromising the very precision you are chasing. By adjusting hardness, resilience, and self-sharpening behavior for each job, custom abrasives turn finishing from a generic process into a controlled part of manufacturing. The result is not simply a smoother surface, but one that holds its geometry and integrity under real production conditions.
Contact Us
Contact Person: Amanda Wang
Email: [email protected]
Tel/WhatsApp: +86-13602569854
Website: https://www.sunabrasives.com.cn